

A portrait rarely looks its best when someone is trying hard to “pose.” The most flattering images usually come from a few small adjustments: a relaxed shoulder, a thoughtful hand placement, a gentle turn toward the light. Learning how to pose for portraits is less about memorizing model-like positions and more about understanding how to feel comfortable, connected, and confident in front of the camera.
Whether you are planning a professional headshot, celebrating a graduation, arranging a family session, or taking couple portraits, good posing should support the moment rather than distract from it. A professional photographer will guide you throughout the session, but these simple principles can help you arrive feeling prepared.
How to Pose for Portraits Starts With Comfort
Stiffness is usually caused by uncertainty, not by a lack of photogenic features. When people do not know where to look, what to do with their hands, or how to stand, they often hold their breath and lock their joints. The camera notices that tension.
Start by standing naturally, with your weight settled more on one leg than evenly across both feet. This small shift creates a softer line through the body and prevents the straight-on, rigid look that can happen when you face the camera squarely. Keep your knees loose rather than locked, and let your shoulders drop before each set of photographs.
You do not need to hold one pose for long. In fact, natural portraits are often created in the transition between poses. Take a breath, adjust your posture, look slightly away, then return your attention to the camera. These small movements give your expression and body language more life.
Turn Your Body, Then Bring Back Your Face
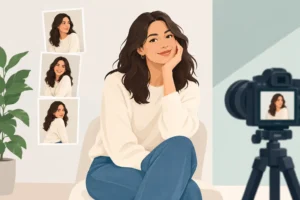
For most individual portraits, turning your body slightly away from the camera is more flattering than facing it directly. Try a quarter turn, with one shoulder a little closer to the lens. Then turn your face back toward the camera or toward the light.
This creates dimension in the shoulders, waist, and jawline without making the pose feel dramatic. The right angle depends on your features, outfit, and the intended mood. A corporate headshot may call for a more direct, open stance, while a lifestyle portrait can feel more relaxed with a stronger turn and a gentle side glance.
Keep your chin slightly forward and then very slightly down. This helps define the jawline while maintaining a natural look. Avoid lifting your chin too high, which can make the nostrils more visible and place the camera below your most flattering angle.
Give Your Hands a Purpose
Hands are one of the biggest sources of portrait anxiety because they can feel awkward when left unsupported. Rather than letting them hang stiffly at your sides, give them a simple job. You might lightly hold one wrist, rest a hand at your waist, adjust a jacket lapel, or gently touch your hair.
The key is to keep your fingers relaxed. A clenched fist or fully spread hand can draw attention away from your face. Think of your hands as calm and soft, with a little space between the fingers.
If you are seated, place your hands naturally on your lap, the arm of a chair, or a nearby surface. Leaning forward slightly from the waist can also create a more engaged, approachable portrait, particularly for professional headshots.
Let Your Expression Change
A genuine expression is not always a broad smile. Depending on the portrait, a calm look, a small closed-mouth smile, or a thoughtful glance can be equally beautiful. The goal is for your expression to match the feeling you want the image to convey.
Try not to force a smile before the camera is ready. Instead, relax your mouth, exhale, and think of someone or something that makes you genuinely happy. A photographer may talk with you, ask you to look at a partner or child, or prompt a small movement to bring out a more natural reaction.
When smiling, let the expression reach your eyes. This does not mean opening them wide. In fact, a slight softening around the eyes often looks warmer and more confident than a surprised expression.
Posing for Different Portrait Sessions
The best approach changes with the purpose of the session. Your pose should suit the people in the frame and the story the photograph is meant to tell.
Individual and Professional Portraits
For an individual portrait, create clean lines and keep the focus on your face. Stand at a slight angle, lengthen your spine, and avoid pressing your arms flat against your torso. Leaving a little space between your arms and body helps define your shape and keeps the pose from looking compressed.
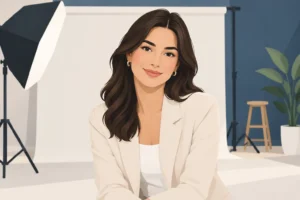
For professional portraits, aim for calm confidence. Keep your shoulders open, make steady eye contact when directed, and choose expressions that feel credible and approachable. Your wardrobe matters too: clothing that fits well and allows comfortable movement will photograph better than something restrictive or overly loose.
Couple Portraits
Couples often look most natural when they focus on each other rather than the camera. Stand close enough that there is no uncomfortable gap between you, then create connection through a hand on an arm, a hand at the waist, or a relaxed embrace.
Instead of both standing in identical positions, vary your heights and angles. One person can turn slightly inward while the other faces the camera more directly. Looking at each other, sharing a quiet laugh, or walking slowly together often produces portraits that feel more personal than a perfectly still pose.
The most polished couple portraits balance direction with real interaction. There is a difference between being told exactly where to place every finger and being gently guided into a position where you can simply be together.
Family Portraits With Children and Grandparents
Family posing is not about making every person look at the camera at the same second. It is about creating closeness, balance, and a sense of belonging. Start by placing the group close together, with shoulders or arms touching where comfortable. Small gaps can look larger in a photograph than they do in person.
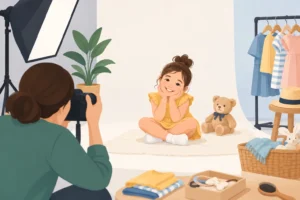
For families with young children, allow movement. A child may need to sit on a parent’s lap, hold a hand, cuddle into a shoulder, or take a short break between shots. Trying to keep a toddler perfectly still often creates more stress than a lively, affectionate moment ever will.
When photographing multiple generations, comfort should lead every decision. Provide stable seating for elderly family members, build the group around them, and keep standing poses brief when needed. A thoughtful studio setup, clear guidance, and patience make these sessions easier for everyone.
Use Light and Camera Distance to Your Advantage
Posing is only one part of a flattering portrait. Light, lens choice, and camera position also shape how an image feels. Soft light is especially kind to skin texture and helps create a polished result without making the portrait look over-edited.
If you are outdoors, avoid squinting directly into bright sunlight. Turn slightly toward open shade or softer light, and let the photographer position you for the most even illumination. In a studio, professional lighting can be adjusted around your features, outfit, and preferred mood.
Camera distance matters as well. A photographer working too close with a wide-angle lens can exaggerate features, while the right portrait lens and distance create a more natural perspective. This is one reason professional guidance makes a meaningful difference: you can focus on being present while the technical details are taken care of.
What to Do Before Your Portrait Session
Preparation should make you feel more at ease, not give you another long checklist. Choose clothing that fits comfortably, suits the setting, and reflects how you want to be seen. Avoid trying a completely unfamiliar hairstyle, makeup look, or outfit on the day if it may make you self-conscious.
Get enough rest if possible, arrive with a little extra time, and share any concerns with your photographer early. If you dislike a particular side of your face, feel nervous about your arms, or need to accommodate a child, pregnancy, or mobility concern, say so. A caring photographer can adapt the setup and direction to help you feel supported.
At ABC Photography, guided posing is part of creating an enjoyable portrait experience. You are never expected to know every angle on your own. The right direction is quiet, clear, and tailored to you.
The next time a camera is pointed your way, do not search for a perfect pose. Settle your shoulders, shift your weight, connect with the people beside you, and let the moment breathe. The portrait will feel more like you because it is.